How to Send Emails via dashboard
Getting Started
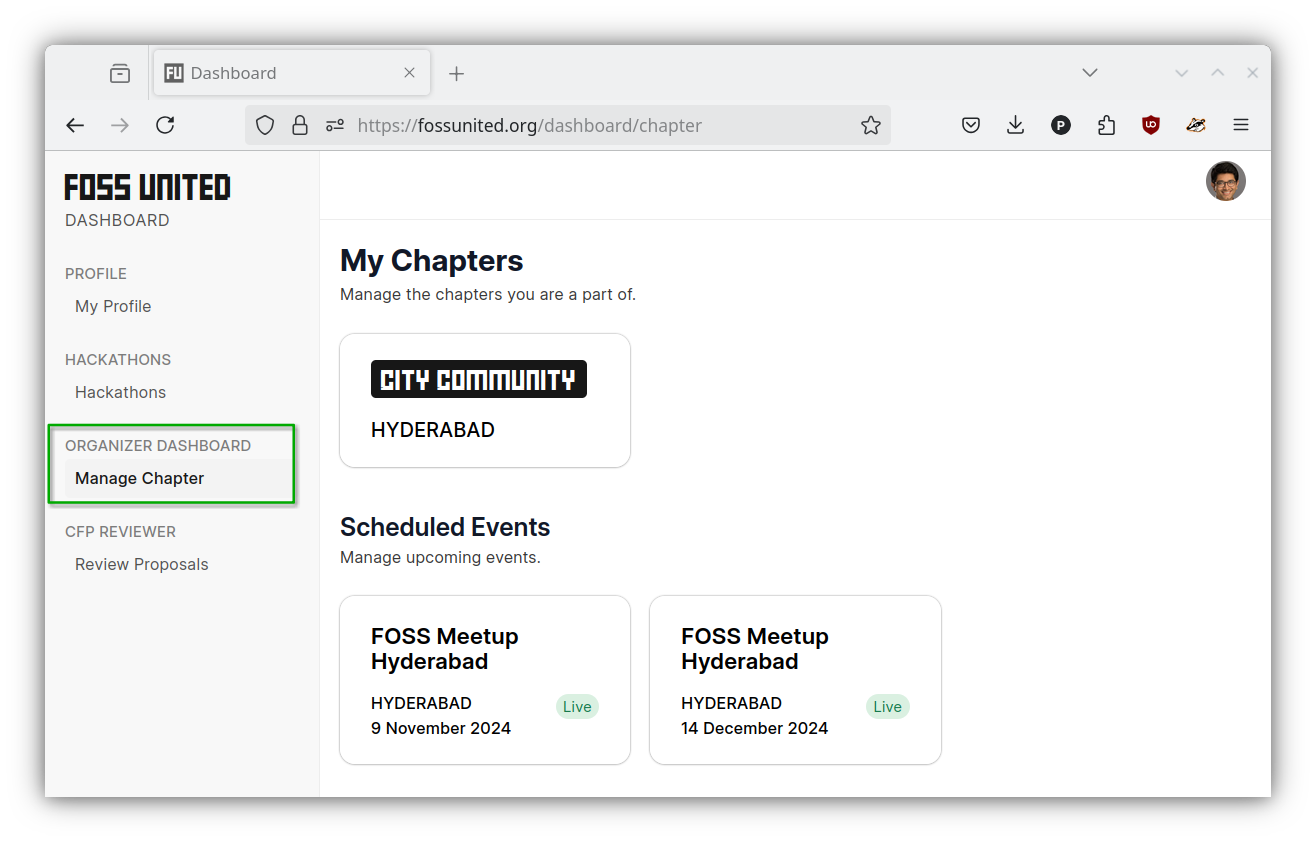
First, log in to fossunited.org. Once you're in, click on your profile picture at the top right corner to access your dashboard, or simply go to fossunited.org/dashboard.
Finding the mailing section
On the left side of your dashboard, you'll see several options. Look for "Organisers Dashboard" and click on "Manage Chapter".
You can send emails to two types of people:
- People who RSVPed to a specific scheduled event
- Chapter subscribers who signed up for updates about upcoming events
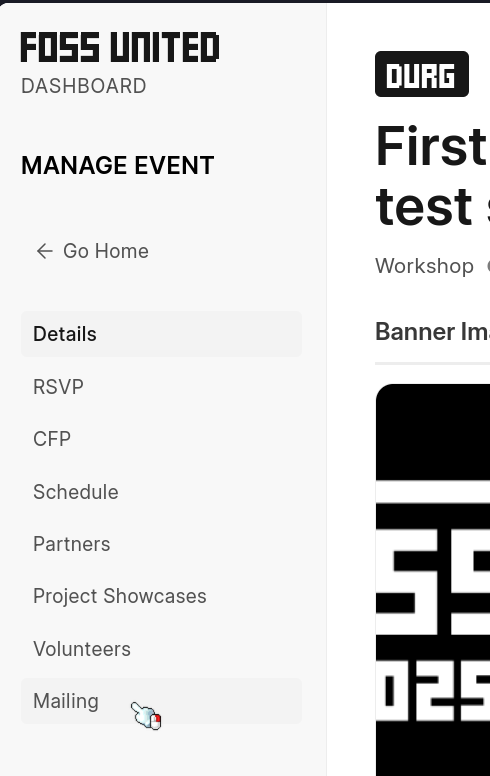
Pick the chapter you want to send emails for. Once you're in, you'll see a menu on the left with options like Details, Events, Members, and Mailing. Select "Mailing".
Creating your email campaign
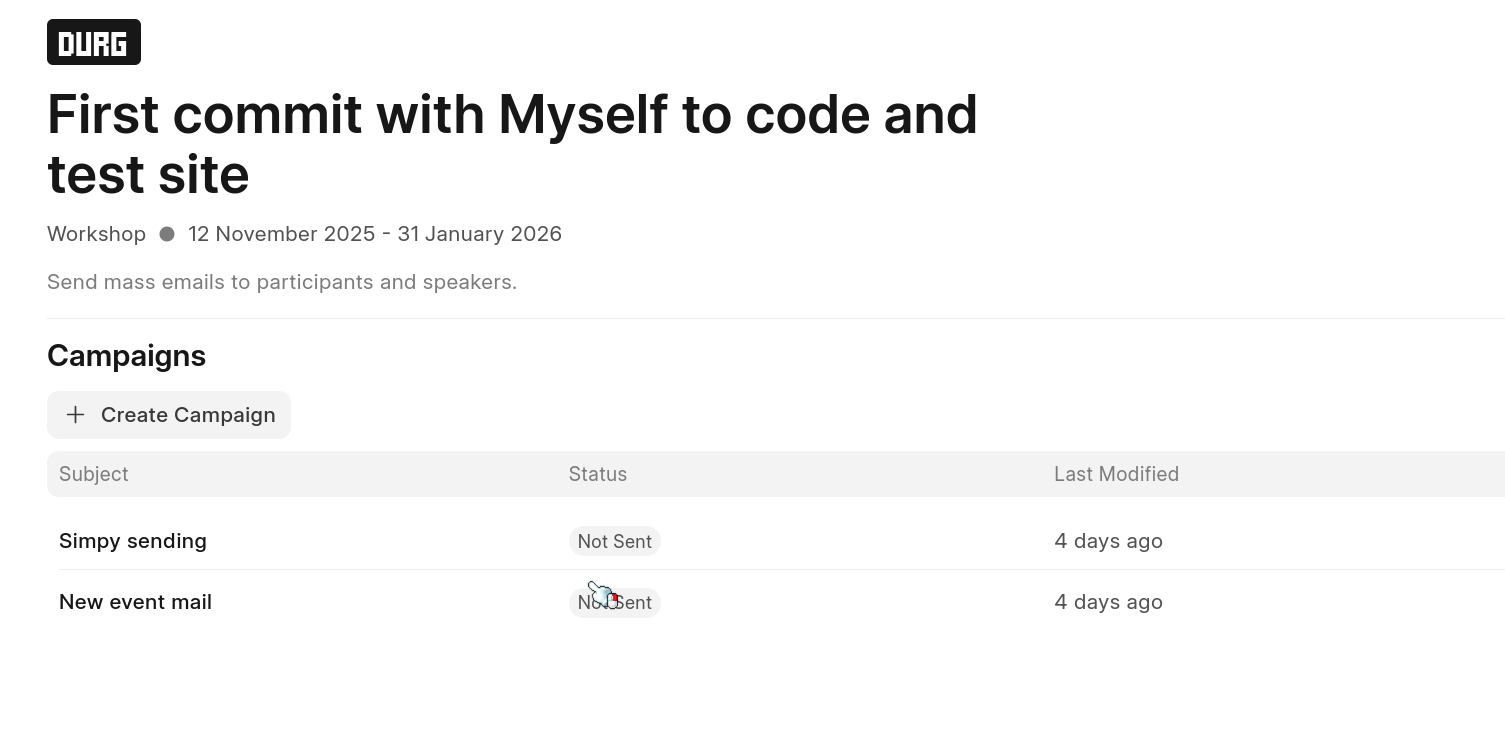
Click the "Create Campaign" button. You'll see a dropdown menu asking who you want to send the email to. You can choose from:
- CFP proposers
- Event participants (people who RSVPed)
- Accepted proposers
- Rejected proposers
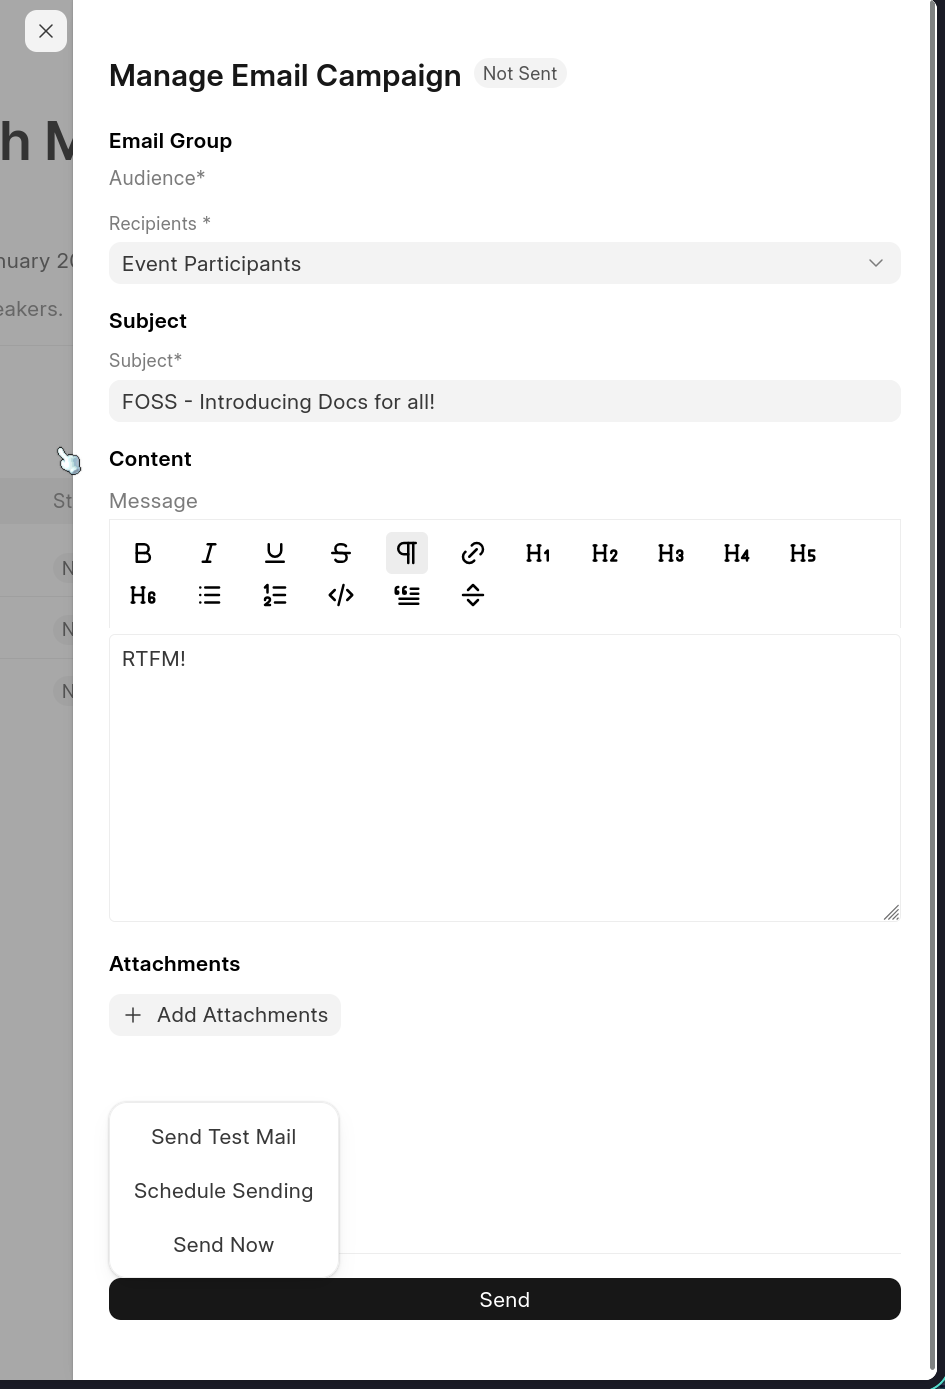
Pick the group you need, then write your subject line and type out your message.
Adding attachments
If you need to attach files, click the "+ Attachment" button below the message box. You can upload PDF, JPG, PNG, SVG, or JPEG files. Just make sure each file is under 10MB.
Sending your campaign
After creating the campaign, it won't send automatically. Click on the campaign you just made, and you'll see options on the right side:
- Send Test Email - Try it out first to see how it looks
- Schedule - Pick a date and time to send it later
- Send Now - Send it immediately to everyone
That's it! Your email will go out to all the recipients you selected.